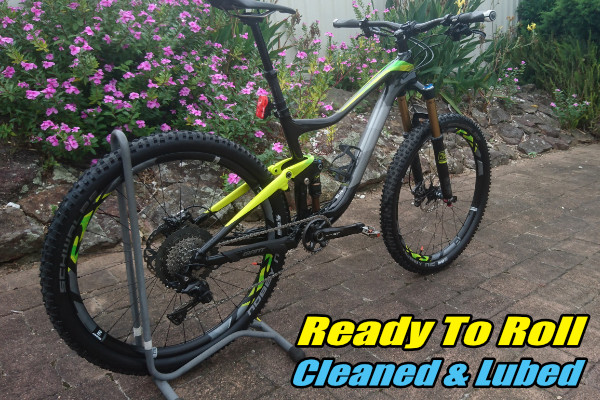
Keeping your bike clean is much more than just wanting it to look it’s best. However, for the newer riders to mountain biking, exactly the best and safest way to go about it (for the bike) isn’t always obvious. So, let’s find out how to get it done and what cleaners and lubes are needed.
Why?
As mentioned already, your bike looks it’s best when it’s clean. However, there are other reasons to keep your bike clean also. Smooth operation, mechanical sympathy, frame inspection and preventative maintenance are important other reasons.
Smooth operation
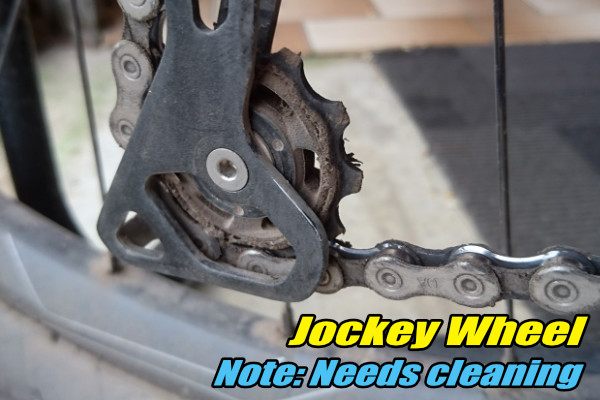
Dust, dirt and mud join the chain lubricant and begin to restrict the chain’s movement. It sticks on the front chainrings and even clogs up the little wheels (called jockey wheels) on the derailleur (rear gear changing mechanism) further inhibiting the chain. All this can affect how your gears change and even make them skip or change lazily. Dust will also gather around the suspension and, over time damage the oil seals and protective coating on forks and shocks. This can cause stiction (initial stickiness) when the forks or shocks begin moving down.
Mechanical sympathy
A clean bike, that is running smoothly is less likely to wear parts out quickly than a bike which is not cleaned and lubed regularly. The mountain bike operating environment can be a harsh place. Parts that are free from friction and abrasives caused by dust, dirt and mud are going to run smoother and last longer. As an example, a road rider might need to change their cassette (that cluster of cogs on the back wheel) maybe once every few years. This is because very little dust and dirt etc gets onto their drive-train (includes the chain, cassette, chainrings) and what little that does, is easily cleaned away. By comparison, the mountain bike drivetrain operates in a cloud of dust and has dirt, grit and stones thrown at it constantly on every ride in the forest. Add some rain and now all that dust, dirt and grit becomes a grinding paste working it’s evil into each chain link and on every tooth of every cog you use. A mountain biker who rides most days and does hundreds of kilometres each week may be changing their cassettes twice a year, or more.
It’s not difficult then, to see why regularly cleaning your bike (including your drive-train components) is a necessary part of being an MTB’er. A dirty chain will not run as smoothly around the cassette, derailleur and chainrings as a clean one. Piling on more lube might help, but you are still fighting more friction from the dirty drivetrain than if it were new or cleaned regularly.
Frame inspection & preventative maintenance
During and after the cleaning process is a great time to carefully inspect your bike for problems. It’s now, while you are meticulously cleaning it, that you really look at your bike closely and actually see the individual parts. Normally you just see a bike. Now you see a top tube, a gear cable, a chain, seat rails etc etc. Use this time to look at things closely that don’t look quite right. A scratch in the paint might be a crack in the frame. Let’s hope not but it does happen. You might notice the gear cable is looking ratty at the end, that could pull through the clamp and badly affect your gear changes for instance. You might notice a cut in the sidewall of your tyre or that your brake pads are very low. As a newbie you may not know exactly what to look for but you will learn and get good at seeing potential problems if you keep at it.
Bath time
So then, time to clean the bike. Out with the high pressure cleaner right? Ah no, not recommended as they tend to force water past seals on things like headsets and bottom brackets etc. This is a chore best done by hand with a garden hose fitted with the trigger spray nozzle. We’ll talk about degreasing the driveline later but for now we’ll assume that’s not needed. Lets assume your bike has had a couple of rides, been through a few puddles or creek crossings and has a mixture of dust, dirt and some dried and semi-dried mud on it.
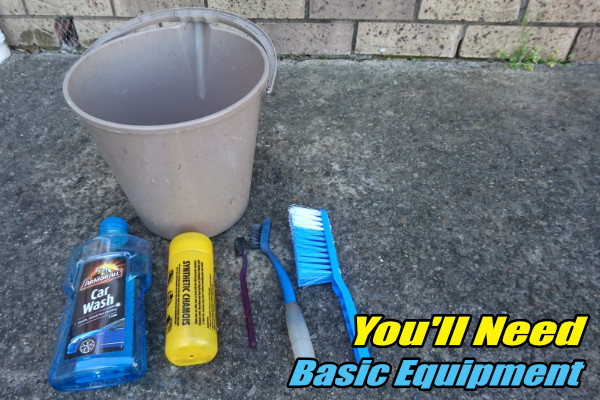
What you’ll need
A bucket half full of water, detergent, sponge or chamois, a small brush (soft bristles), a harsher brush (like from a dust pan and brush kit). Somewhere out of the sun on hot days.
Don’t use household detergents! Why not? Because they are not usually PH neutral (they are acidic or alkaline and therefore corrosive), are usually too aggressive and even may contain salts.
Do use a proper bike detergent from a bike shop or a car wash detergent. These will not contain any of the harmful elements mentioned above.
The Process
Give the bike a good, soaking hose down. Focus on any built up mud etc but don’t linger over any parts with seals such as the bottom bracket (where the crank axle goes through the frame), headset (where the handlebars pivot), wheel hubs/axles or suspension pivots. While that’s all soaking in and softening up the more stubborn dirt, half fill your bucket and then pour in the required detergent (see the packaging for recommendations) and toss in the sponge or chamois obviously.
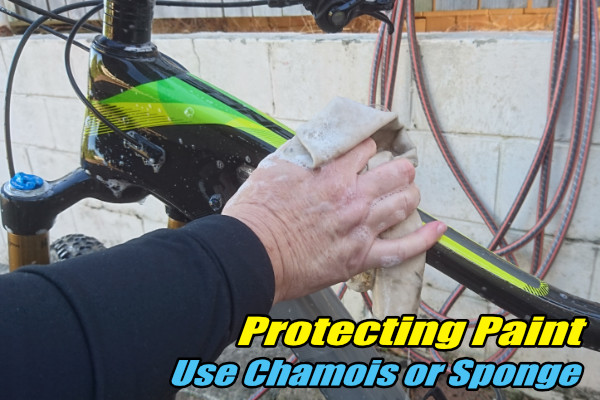
Take the sponge or chamois and liberally wash down all the more easy to reach parts of the bike. These will include the top tube, front and sides of the bike including the forks. Give those parts a rinse off, inspect and repeat if needed. I prefer a sponge or chamois to a brush for this because nice paint jobs get lots of brush marks after several washes if using a brush on the more open areas.
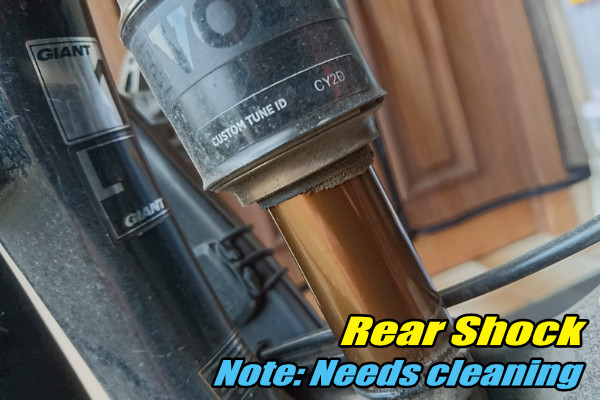
Take the small brush and clean around the harder to get places like the seals on the forks and rear shocks, behind the rear shocks and around the pivot points if it’s a full suspension bike. You can give the derailleurs a clean with this also if you choose but avoid if they look oily. Just use a rag in that case. Rinse and repeat if needed.

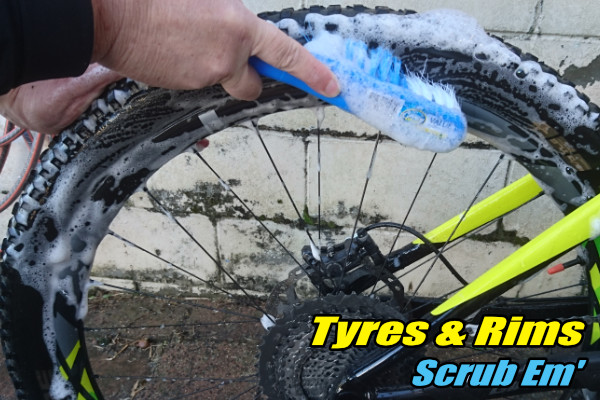
Take the harsher brush, dunk it in the bucket and get stuck into the tyre sidewalls and the wheels. Don’t forget to give the spokes a quick brush as well. Rinse and repeat if needed.
And that’s the general cleaning dealt with. Give the bike a bit of a bounce on the tyres a few times to shake off excess water and put somewhere to dry. You can chamois the frame dry if you really want.
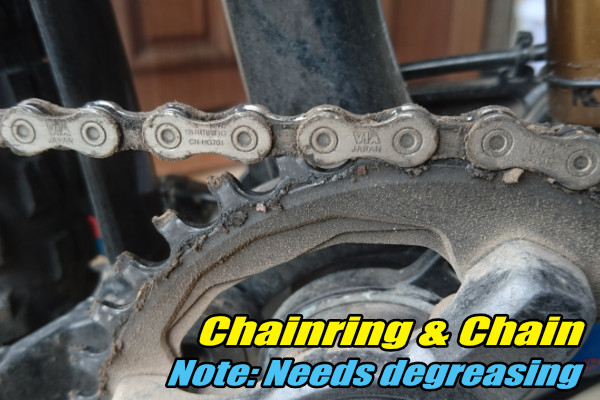
A filthy drive-train
If your chain is looking at all black and caked up, a degrease and clean is a good idea to keep the drivetrain (chain, derailleurs, chainrings, cassette) operating at it’s best. If you need to degrease the drive-train, do this before the general clean so you don’t mess up your nice, clean bike in the process.
Cleaning the drivetrain is more complex than washing the bike. How often you clean the drive-train depends on the type of lubricant you use, the conditions you ride in, and how particular you are.
Let’s not get too technical and fussy in a newbie guide to cleaning your bike. For this article, we’ll stick to a basic drive-train clean you’ll do after a few rides.
Some bike shops offer a degrease service, and with all the right equipment in place, they certainly do a good job. If your drive-train is looking particularly bad, you might want to consider looking for a bike shop to do the job. Some bike shops will sell a bike specific degreaser also. You can also purchase tools for cleaning the chain and even the cassette. I use a grout brush and old toothbrushes. The proper tools always make the job easier though.
Degreaser
For degreaser you can use those spray degreasers you find for a few dollars in auto shops or even the supermarket. However you do have to be sure you wash it off very well to ensure no damage to paint or discolouration to shiny parts. Citrus or water based degreasers are nicer products on your paint and parts but might need more goes to get the job done. Still wash these off very well. Never let degreaser of any type dry on the bike.
Quick Degrease
For a quick degrease, grab a rag and soak a good portion of it in degreaser and simply give the chain a good wipe down. It’s a cheat’s way to getting it at least looking ok and will have a marginal, positive effect.
Decent Degrease
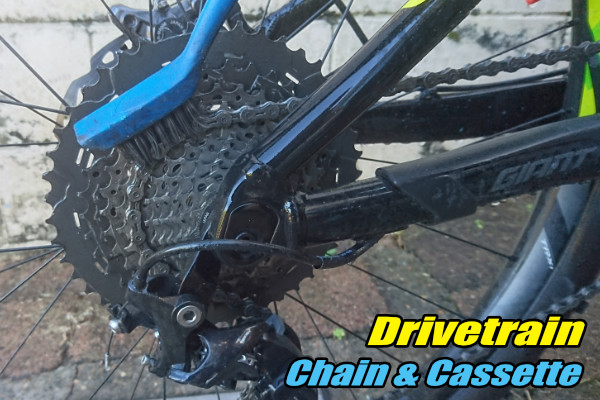
For a decent degrease, start by giving the bike a general hose just to wet it’s surfaces and stop anything sticking to it during the degrease process. Apply the degreaser to the chain from a spray can or bottle while slowly rotating the chain by turning the pedals backwards. Once you are sure you have got all the chain well soaked in degreaser, do the same for the cassette. If you see any large clumps of grass or other matter in between the cassette cogs then remove them first with something narrow enough to get in without spreading the cogs apart. Spray the degreaser onto the chainrings also. I do not recommend spraying the derailleur jockey wheels directly. Your degreaser soaked brushes will have enough on them to get the job done once you’ve done the chain and cassette.
Again slowly rotate the pedals backwards and this time, using the toothbrush, grout brush or other chosen brush, scrub the chain, cassette and chainrings. Your chain may want to skip down a few cogs when you apply pressure so just find the gear it likes and set it there for the job.
The jockey wheels (two plastic chain guide wheels) on the rear derailleur also collect greasy buildup. Although it doesn’t affect the performance of the chain until the buildup literally gets thick enough to impede the chains flow, it’s still good practice to clean them regularly.
By removing the wheels from the derailleur you can more easily clean them but I don’t recommend you do this unless you know what you are doing. You can clean them sufficiently with a rag or brush while they are on the derailleur by again using the pedals to rotate the chain backwards and thereby turning the jockey wheels.
I also lube the moving parts of the derailleur from time to time with a spray lube that doesn’t attract grit, such as silicon spray.
The front derailleur very rarely needs any cleaning other than a spray of water when you wash the bike. Like the rear derailleur, the front one just needs lube every now and then with something like silicon spray.
Rinse carefully. Don’t use high water pressure around the cassette where the wheel hub is or around the bottom bracket. Once done you can give the chain a wipe down with a rag if you want using the pedal rotating method. Give the bike a bit of a bounce on the tyres a few times to shake off excess water and put somewhere to dry. Once the drive-train looks dry enough, it will need to be lubed again.
Show time
If their bike has a nice, glossy paint job, some people like to go a bit further after the cleaning is done and apply polish to further enhance the look. I don’t discourage this, even though I think it has a fairly short term effect. The dust on the trail will certainly nullify the polished presentation pretty quickly out there, but it can’t hurt. Car polishes are fine. Another easy option is Mr Sheen furniture polish.
Want your tyres to not only look good but also stay cleaner and clean easier? Silicon spray works wonders. I get it from auto parts stores and spray it into a rag and apply it to the sidewalls of my tyres. It soaks into the rubber and makes cleaning a breeze by comparison. Just be careful that it doesn’t remove any the sidewall writing on the tyre if you like that.
Lubricating the bike
For your drivetrain, I definitely recommend using a proper bike specific lubricant. After that, it’s all up to the user as to what they prefer. Most good lubricants are based on either wax or oil.
Good wax lubes tend to collect less grit than oil based ones and therefore the drivetrain stays cleaner longer and the grinding wear effect over time is less. They rarely last as long on the chain as an oil based lubricant though so you may have to re-apply during some longer rides. The oil based lubes tend to run smoother for longer although they will go darker on the chain and attract more grit etc meaning more wear long term and more degreasing sessions are needed. Oil based lubes tend to stay on much better than wax based in wet weather. A stand out lube is Rock n Roll Blue or Gold. This unique type of lube runs clean and tends to outlast standard wax based lubes. If applied liberally, it will also displace grit where it can giving it a ‘self cleaning’ quality. There is still substitute for regular degreasing and re-lubing though.
Chain
Remember also, that the outside of the chain doesn’t need any lube at all. The lube is needed on the rollers and pins and between any bits that move against each other. For this reason, no matter what lube you use, you can grab a rag, grip the chain and again using the backwards pedal rotating method, remove any lube on the outer plates of the chain. This will at least cut down on the dirt attracted to the lube and keep the chain looking a bit cleaner for a bit longer. Always lube your chain as often as it needs. If it’s noisy or doesn’t feel smooth, add lube. If in doubt, add lube.
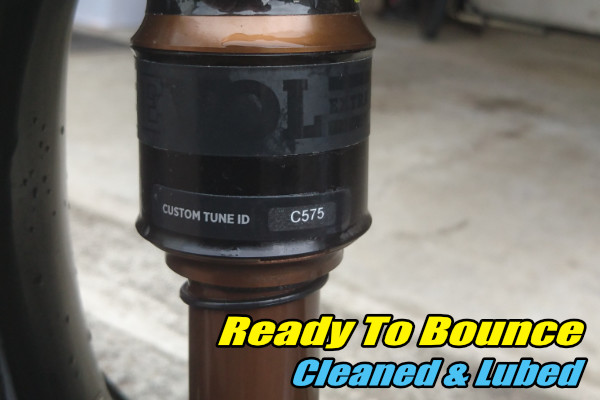
Suspension
Now that your forks and rear shock (on full suspension bikes) are clean and dry, you should compress them both a few times to get the rubber seals moving. Just inside the rubber seals is something that coats the stanchions (shafts) with oil from inside the fork or shock. It allows a tiny bit of oil to come out and coat the outer stanchions when you do this. I like to spray the seals with some silicon spray and rub that around before cycling/compressing the fork and rear shock several times just to be sure.
Derailleurs
I will also spray the silicon spray on the pivots on both derailleurs from time to time as well. Probably not totally necessary, but I do it anyhow.
Brakes
Never let any lubricant get anywhere near your brakes. The lubricants will soak into the brake pads and contaminate them. This will cause noise and reduced braking and necessitate new brake pads being fitted and the disc rotor being cleaned well with a white spirit. Not Casper by the way, a white alcohol based cleaner.
Summary
It all sounds like a lot of work but it really isn’t. Once you are used to it, you’ll give your bike a quick degrease and clean in about 15 or 20 mins. A really thorough session might be 30 to 45 mins but you are fairly pedantic if it takes that long once you know what you are doing.
Ok, well lets see what we’ve covered.
- A clean bike runs smoother and parts last longer.
- Don’t use high pressure water cleaners.
- Do use a spray nozzle on a hose.
- A car wash sponge is less likely to scratch your paint than a brush.
- A small brush is fine for those tight spots.
- Wet bike down and degrease before cleaning.
- Use bike or car washing detergents only.
- Citrus or water based degreasers are nicer for your paint and parts than car degreasers.
- Don’t concentrate water at bearings, hubs, seals (or penguins) etc.
- Yes, you can polish your baby (the bike I mean) with car polish or Mr Sheen. Note: We don’t recommend polishing your children at any age.
- Use only bike specific lubricants.
- Keep your chain well lubed.
- Cycle (compress and release) your forks and rear shock after cleaning and dry.
- Never get lube on your brakes.
Hope that helps!