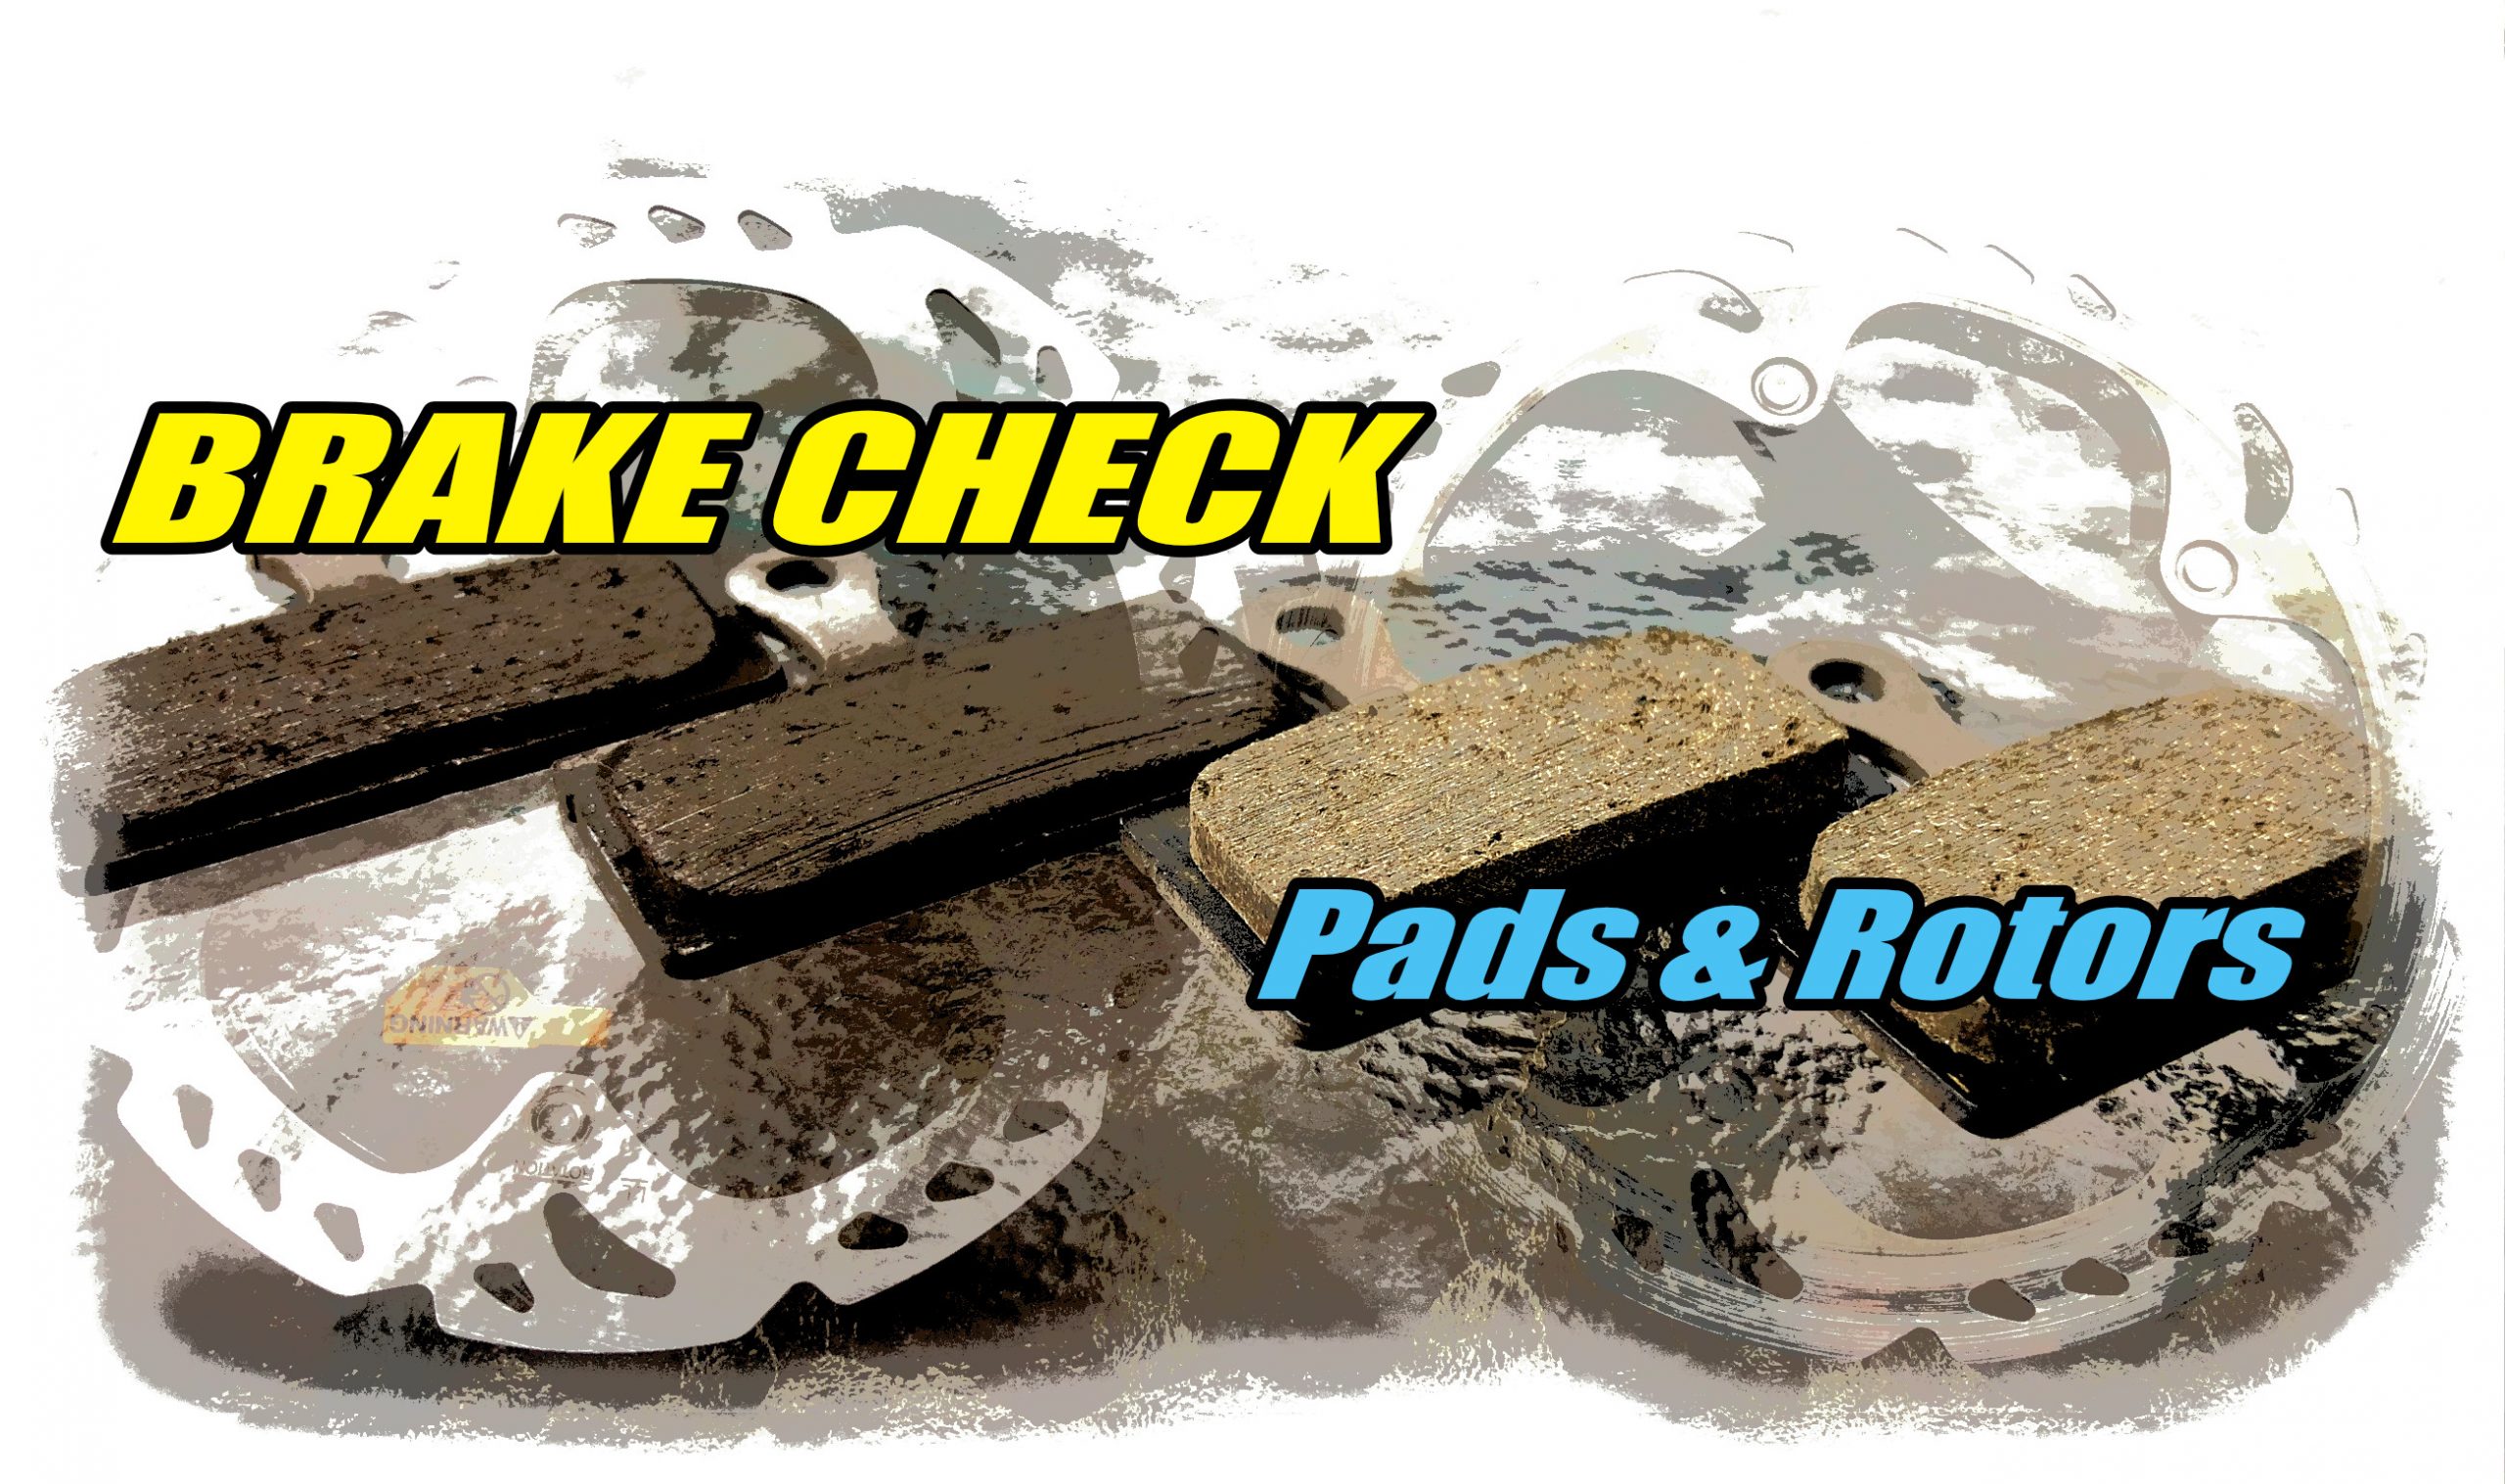
Brake Check
Checking your brakes is a good habit
If you’ve been riding for years you probably do check your brakes regularly, or maybe you don’t. You’ve probably been out on a ride at some stage when suddenly things got awfully noisy when you applied your brakes, only to find you’d worn them completely out. That metal on metal sound, as the brake pad backing plate grinds your disc rotor down, is so very comforting isn’t it? About as appealing as fingernails down a blackboard or a crow squawking at 5am in the summer.
In this article we’ll take a quick look at how to check your disc pad and disc rotor wear. It’s not hard and well worth the effort.
Pad wear & brake levers
On average, you might get many months out of a set of disc brake pads. Yet, I’ve seen them worn out in a week also. Quality, compound, how many kilometres you ride and riding conditions can all have an impact on your pad wear. On most modern mountain bikes you do have a disc brake wear indicator of sorts though; it’s your brake levers. As your pads wear down, your levers will travel closer to your handlebars before you feel the brakes applying. Something to consider if you suddenly feel like your brake levers feel different or weird from what you’re used to.
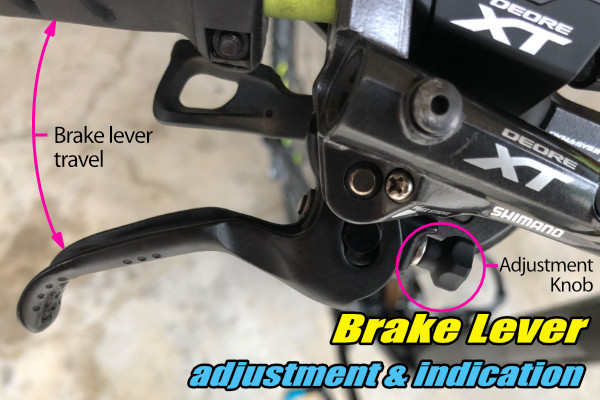
TIP: If your mtb has quality brake levers fitted, they will have an adjustment for where the levers relax to when you are not applying them. Sometimes this is a nice big knob (as shown in the image) but sometimes it’s a less conspicuous screw. This is a great adjustment, especially if you have small hands (most women should have pricked up their ears upon hearing that), because you can set the levers to be more comfortable and accessible.
To adjust, simply turn the knob or screw and watch the lever. It will move either closer or further away from the handlebar. Find the position that best suits your hands so you can easily hold the lever without actually applying the brakes. Check that when you apply the brakes hard, you don’t jam your fingers between the lever and the handlebar. Now you can rest your hand comfortably on your brake levers and still apply the brakes as needed while maintaining control with your handlebars.
Checking for pad wear
So then, you’ve noticed something isn’t right about your brakes and you want to check to see if your brake pads are wearing too low. How do you do that? Where do you start?
Firstly, you need to know what a worn set of pads looks like. No pointing looking if you have no clue what you are looking at anyhow right? Let’s sort that out now.
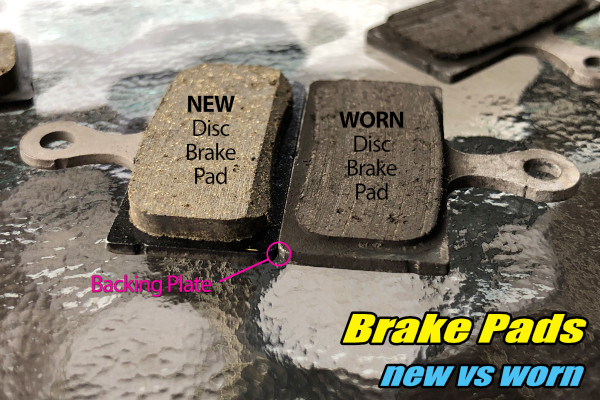
In the image below we see two disc brake pads. On the left, a new pad. On the right, a worn pad. Notice how much thicker the new pad is compared to the worn pad. Closer inspection of the worn pad may also reveal that it’s more worn on some sides than others. This is typical and caused by how the brake callipers (the unit that the brake disc pads slide into) are adjusted on your bike frame. Personally, I don’t like running pads much lower than the worn pads in the pic because it’s very easy to suddenly find them start to wear quicker at this point and catch me out when I need them most. Other considerations is that a thinner pad won’t handle heat as well which diminishes braking capacity, especially on long descents. Thinner pads are usually well grooved and tend to feel more notchy/harsh than new pads also.
So, now we have an idea what a worn disc brake pad looks like when it’s out and easily to view. What about when it’s still on the bike?
Checking pad wear on the bike
To accomplish this you are going to need to locate your brake calipers and make sure you can see into the calipers (with enough light) where the pads are located. In our example, we’ll use the rear brake caliper cause it’s the easiest. So, in the image below, we can see where to find the rear caliper and rear disc rotor on most bikes. Some bikes have these located between the frame’s rear tubes and you may need to remove it to see in. The front caliper is obviously located near the bottom of your forks.
Please note also that there are many brands of brakes out there and some are easier to see into than others. Sometimes pulling the wheel off and looking into the other side of the caliper may be necessary to get a clear view.

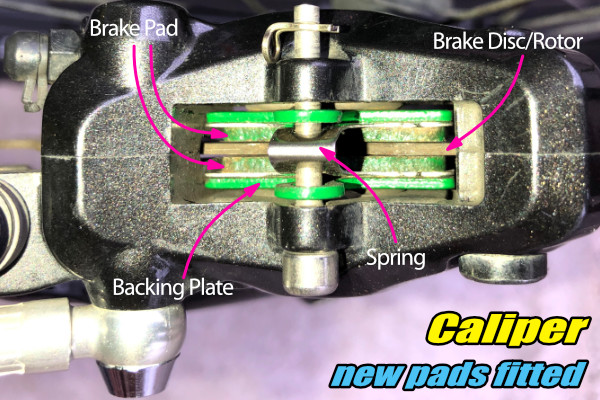
Our next image (below) shows a close up into the top of the caliper. In there you can see the brake backing plates (bright green in this pic), the silver spring, the disc pad compound (the bit that wears down) and the disc rotor. You can see the thickness of the pads and, comparing them to the worn pads in a couple of pics above, you can tell these are nice and new. If it looks like the backing plates are almost touching the rotor, it’s time for new pads.
Rotor wear
It’s important to understand that the constant braking takes a toll on your brake rotors as well. You won’t need to change these anywhere near as often as brake pads, but they do wear down. Let’s look at that as well.
A rotor that has worn thin will not handle heat build up well. It will heat up much quicker and warper easier. A warped rotor makes your brakes pulsate and rub on the brake pads causing friction you have to pedal against. Friction bad. Unless you are actually trying to stop.
In the image below we can see two rotors and it’s clear which is new and which has been used to death.
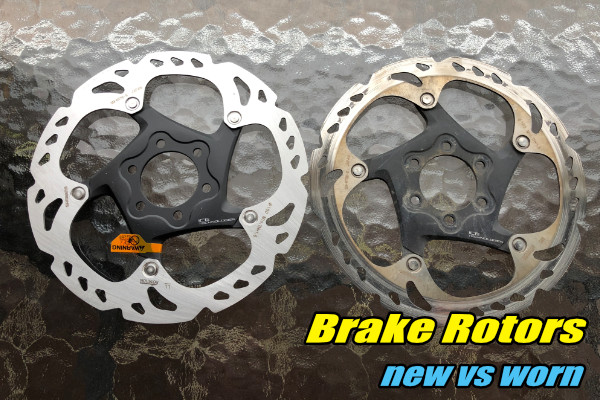
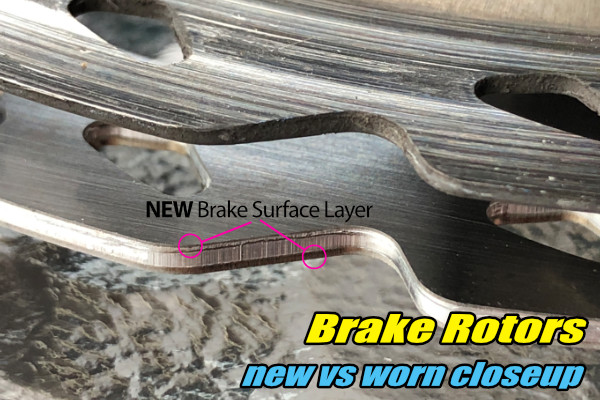
Looking at the image below, the worn rotor is grooved, notched and very thin compared to the shiny new one underneath. Grooves and notches aren’t usually something to be too concerned with if your brakes seem to be operating correctly. The thickness however is a concern. You can see clearly in the image below the difference in rotor thickness. In this case, these are Shimano’s ‘Ice Technology’ rotors which have specific braking layers. You can see how these layers are worn completely off on the worn rotor. That rotor was not performing anywhere near how it should have been, and should have been replaced before it got to this state of wear.
Summarising
So then, we all knew our brakes wore out, and now you know exactly what that looks like and what to look for.
I suggest checking those brake pads regularly. Every couple of weeks doesn’t hurt. Get in the habit and save yourself grieve out on the trail.
Hope that helps.